Nozomi Networks Labs recently conducted research on the security of a DJI Mavic 3 Series drone, with a special focus on the WiFi-based protocol called QuickTransfer Mode. This protocol enables a user to quickly download videos and pictures from the drone directly to their mobile phone when the drone is not flying.
After successfully downloading and analyzing the firmware, we discovered several vulnerabilities that have yet to be patched. As the patching process is still ongoing, we are unable to provide specifics on these vulnerabilities. However, we plan to share further details in a future blog once the patches have been released.
In the first part of this blog series, we describe the firmware upgrade procedure implemented by DJI via their cloud-based infrastructure, analyze the official DJI mobile app, and detail how we were able to bypass its protections to download and analyze the official firmware.
DJI Communication Components
Typically, when conducting a security evaluation on a device, the initial phase involves extensive analysis of the firmware. This allows the researcher to obtain and inspect binaries and configuration files that make up the operating system and primary services running on the device.
Unfortunately, firmware images for DJI devices are not available for download, although some third-party web platforms distribute them for the most used DJI drones and RC (remote controller). While that may have been an option, as security researchers we don’t like to rely on third-party platform to obtain firmware images for several reasons:
- It’s unclear if the third-party platforms are trustworthy and if they distribute authentic data;
- It is uncertain how long the images will remain accessible online;
- We require immediate access to new firmware releases to be able to analyze newly introduced features.
For these reasons, we opted to analyze the DJI firmware upgrade procedure on a physical drone to obtain the firmware directly from the DJI cloud infrastructure.
In order to intercept a firmware package sent to the drone, we must understand the primary communication components involved in the upgrade procedure:
- DJI Cloud infrastructure: the cloud-based web infrastructure that stores firmware packages for each drone model;
- Remote controller: the device that acts as a remote controller for the drone. This is comprised of two different components:
- Radio controller: a DJI-specific hardware that communicates with the drone through a DJI proprietary wireless protocol called OcuSync, and
- Mobile device: a smartphone (IOS or Android) physically linked to the radio controller that acts as graphical interface for the user;
- Drone device: the target device that receives and installs the firmware upgrade package.
DJI Firmware Upgrade Procedure
To connect to the radio controller, the mobile device must have the official DJI Fly application, which can be downloaded and installed from the official DJI website. This app enables users to get new firmware releases and push them to the drone through the radio controller. Whenever a new firmware release is available, DJI Fly sends a notification to the user who can choose whether to install it or not. The firmware is signed by DJI and will only be accepted by the drone if the signature validation is successful. Figure 1 displays an image from official DJI documentation that provides an overview of the entire process.

After conducting a quick analysis of the mobile application, we were able to gather some additional details which are summarized in Figure 2. Although we attempted to passively sniff the traffic between the mobile application and cloud infrastructure, we quickly realized that this was not sufficient due to the encryption provided by HTTPS.

Our initial attempt at a man-in-the-middle (MitM) attack also failed due to certificate pinning implemented in the mobile application, which only allows connections with services that provide a trusted TLS certificate. The certificate pinning can be implemented in several ways, with standard libraries or implemented with custom code directly inside the application. To avoid further blind attempts and overcome numerous obstacles, we decided to conduct a more thorough analysis on the DJI Fly mobile application and develop a targeted attack scenario. The good news is that inspecting the application can provide valuable insights to enhance our analysis.
DJI Fly Application Analysis
We analyzed the latest DJI Fly app version available for Android at the time of the analysis:
- Version 1.9.0-3055175 (December 2022)
- SHA256 7fbc75516445cf6c26decc08d286f76a46ab8079
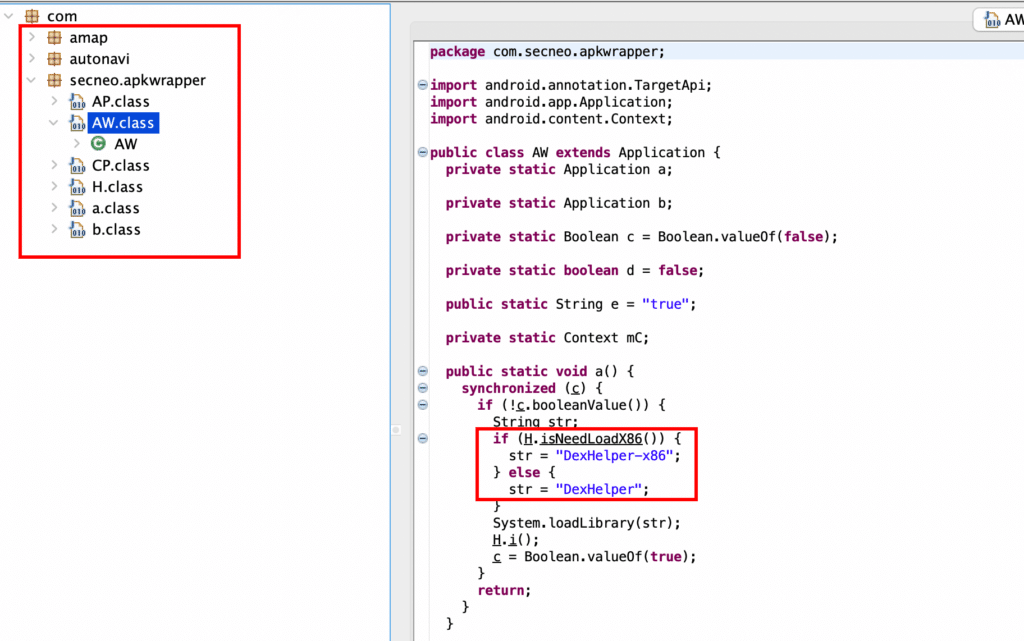
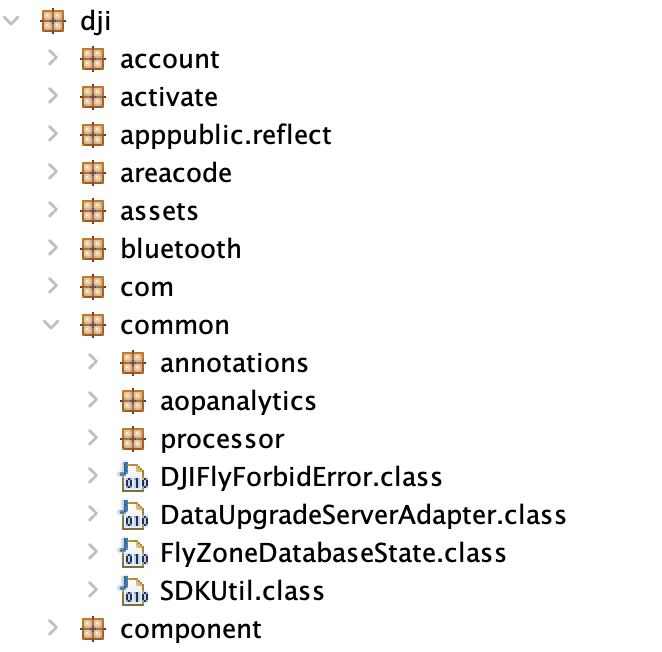
Defeating the Certificate Pinning
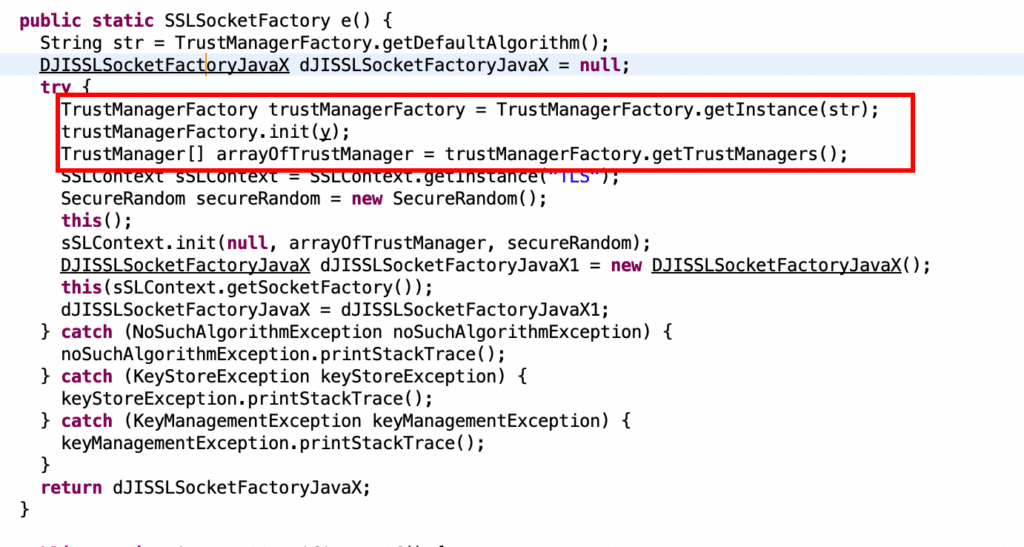
- LSPosed Framework, which allows injection at zygote level.
- TrustMeAlready plugin, which implements the TrustManager Android class instrumentation at the zygote level during the application start-up.
Firmware Download and Analysis
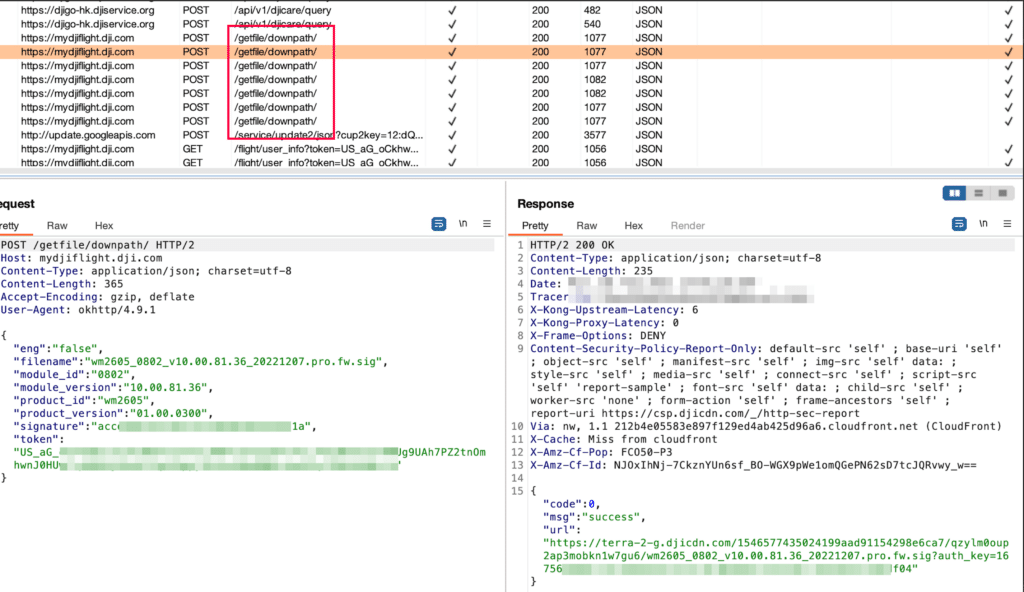

- An image header containing the size (number of chunks) of the encrypted chunk-based payload together with checksums of the encrypted and decrypted data.
- A list of chunk headers that specify the offset and size of data chunks inside the image.
- An RSA-based digital signature of both image and chunk headers.
- The list of AES encrypted chunks that contains the necessary data required for upgrading the firmware
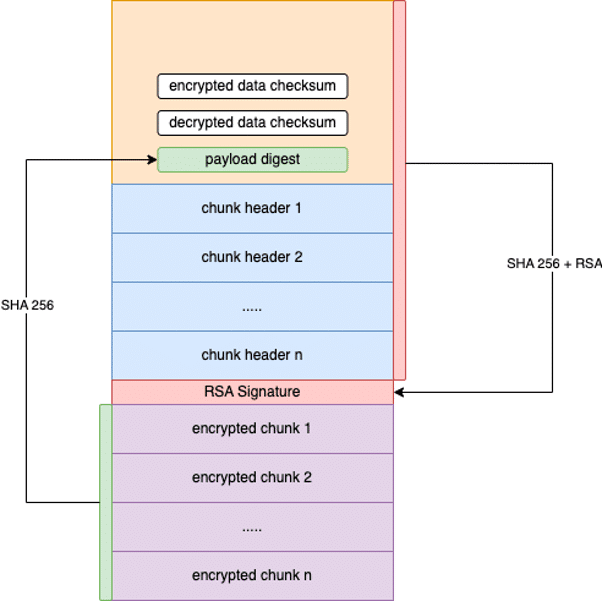
The firmware image’s authenticity is enforced by the digitally signed image headers. An attacker aiming to alter any kind of data should update the checksum and digest values inside the image headers (Figure 8), requiring a new valid RSA signature to be generated (obviously unfeasible without the required private key). This ensures that the drone will only install a firmware if it is provided by DJI. From the official DJI documentation it is possible to understand that key management is enforced on the drone trough ARM TrustZone CryptoCell that stores keys to perform encryption and signature verification operations.

Once unpacked, the chunk was found to be a JAR archive, shown in Figure 10. Upon inspection, it was found to have the same structure as an Android OTA package as described in the official documentation. This leads us to believe that the Mavic 3 drone series runs an Android-based operating system.
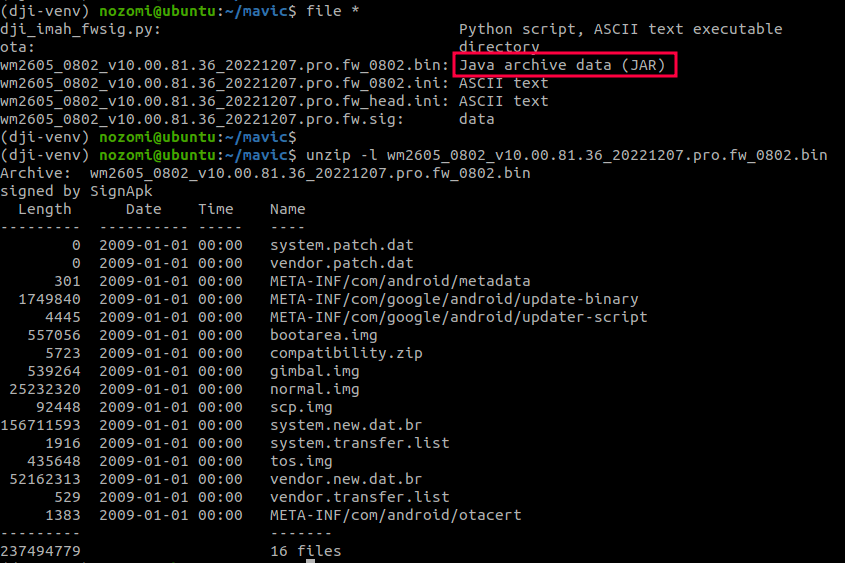
After unzipping the content of the archive, we focused our attention on the files that make up the main Android operating system – namely, the kernel, binaries, and configuration files. This is because our main objective is to reverse engineer and potentially identify any vulnerabilities on services running on the drone.

The decrypted chunks primarily consist of the Linux kernel image along with its required files to run, and an additional archive that contains the root file system partition that can be unpacked using cpio. Copying the previously extracted vendor and system folders inside the root partition completes the file system Android layout, in Figure 12, with everything necessary to analyze and reverse engineer the services running on the drone.
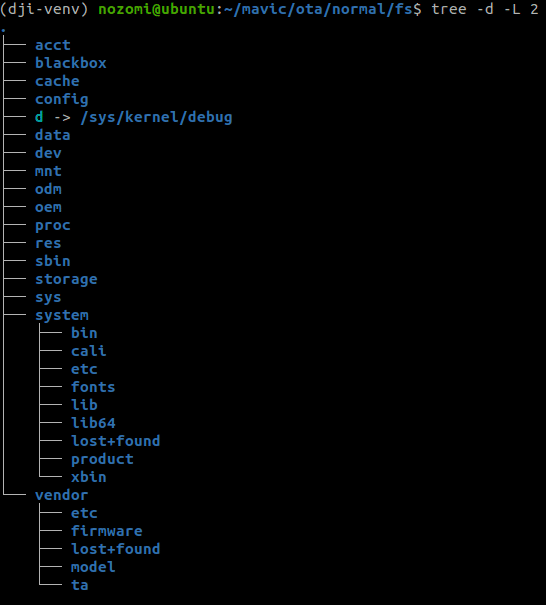
Now that we have the complete file system of the drone, we can inspect the operating system configuration to understand the internals and map the attack surface.
Thorough analysis of the init scripts (including init.rc and all imported configuration scripts), it is possible to figure out which the main services run on the drone and which binaries implement them. This allows us to potentially statically reverse engineer them and, if possible, dynamically analyze them through emulation.
DJI dominates the drone market with a share of over 90%, catering to both professional and amateur users. Given their significant market presence, any security vulnerabilities in DJI’s devices could have a major impact and should not be underestimated.
In Part 2 of this blog series, we’ll look at several vulnerabilities uncovered by further analysis, related to the QuickTransfer Mode implemented on the Mavic 3 Series.


